
How to Replace a Garbage Disposal
Swap out a dead or leaking garbage disposal under your kitchen sink by safely disconnecting electrical lines, removing the old unit, and mounting the new replacement.
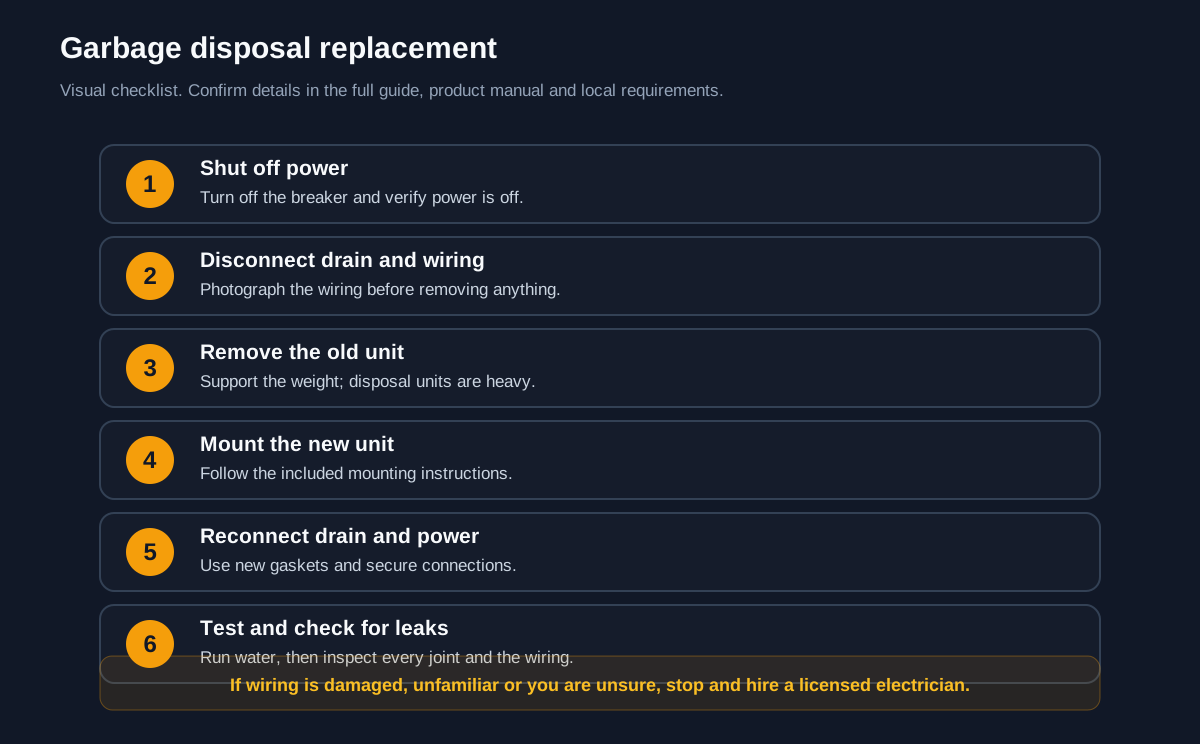
Turn off the breaker, verify power is off, photograph the wiring and drain, support the old unit, install the replacement with new gaskets, reconnect the drain and power, then run water and check for leaks.
Watch: How to Replace a Garbage Disposal
Cut the power, disconnect the drain and flange, swap the unit, and check every joint for leaks. · 3:28 minute walkthrough. The full written steps are below.
Replace the disposal without creating a leak
The job has three risk areas: electrical power, the weight of the unit, and the drain connections. Control those first and the replacement is manageable.
Before you start
- Turn off the breaker and verify power is off.
- Photograph wiring and drain connections before removal.
- Support the unit while unbolting it.
- Use the new gaskets and mounting hardware supplied with the replacement.
Common failure points
- Damaged or unfamiliar wiring is a stop condition.
- Do not hang the disposal from the drain pipes.
- Run water and inspect every joint before closing the cabinet.
Keep learning
- Clean a Garbage DisposalTry cleaning before replacing it.
- Replace a Kitchen Sink FaucetA related sink upgrade.
- Unclog a Kitchen SinkKeep the drain flowing properly.
Visual step map
See the full sequence before you start, then check off each step as you go.
0 of 6 steps checked
Materials and cost planner
Select the items you plan to buy, adjust any estimated price, and calculate the selected total.
Editable rough U.S. retail estimates. Estimated all listed: $199.00. Prices are planning estimates, not quotes — tax, store, brand, size and quantity will change them.
Time and finish planner
Estimate active working time from the number of steps in this guide.
Pipe water volume calculator
Estimate how much water a length of pipe can hold.
Use the actual inside diameter, not the nominal pipe size. Fittings, trapped air and pipe condition change the usable volume.
- Read the tools, materials, safety notes, and steps below for free.
- Tap See 20-second demo if you want to understand it first.
- Tap Start Camera Coach when you want hands-free help, or Voice-only if you do not want to use the camera.
- Allow camera and microphone. Point your phone at the work; the coach watches your progress and tells you the next step.
🧰 Required Tools & Equipment
- ✓ Flathead screwdriver
- ✓ Phillips screwdriver
- ✓ Channel lock pliers
- ✓ Hammer
- ✓ Non-contact voltage tester
- ✓ Bucket
📦 Materials & Supplies
- ✓ New garbage disposal
- ✓ Wire nuts
- ✓ Disposal power cord kit (if not reusing old cord)
- ✓ Plumber's putty
⚠️ Safety Checkpoints & Warnings
- • Shut off electrical power at the main breaker box and verify zero current with a voltage tester before touching wiring.
- • Support the base of the heavy disposal unit from underneath while disengaging the mounting ring to prevent it from falling onto your face or hands.
📋 Step-by-Step Guide (6 Steps)
Disconnect Electrical Power
Locate the breaker box and switch off the circuit powering the garbage disposal. Place a non-contact voltage tester against the disposal power switch and the underside wiring box to confirm power is completely dead. If the disposal plugs into a wall outlet under the sink, simply unplug the power cord.
- • Voltage tester shows no light or tone near the disposal wiring.
- • Relying solely on the wall switch rather than turning off the breaker at the panel.
Disconnect Drain and Dishwasher Hoses
Position a bucket beneath the disposal to catch residual standing water. Use channel lock pliers or a screwdriver to loosen the hose clamp on the dishwasher drain line, then pull the hose off the upper barbed port. Unscrew the slip-joint nut holding the discharge pipe to the side of the disposal and slide the pipe clear.
- • Disposal discharge tube and dishwasher hose are fully detached and resting in the bucket.
- • Failing to place a bucket underneath, leading to foul drain water soaking the cabinet base.
Unlatch and Lower the Old Disposal
Place a block of wood or your hand underneath the disposal to bear its weight. Insert the tip of a flathead screwdriver into one of the mounting ring lugs at the top collar and twist counterclockwise to unlock the bayonet ring. Lower the unit down carefully and remove the bottom access plate to disconnect the wire nuts and ground screw if hardwired.
- • The old unit is completely free from the sink collar and set on the floor.
- • Letting go of the disposal before the mounting ring is fully released, causing it to drop suddenly.
Punch Out the Dishwasher Plug and Wire New Unit
If connecting a dishwasher, insert a punch or flathead screwdriver into the disposal's dishwasher inlet nipple and strike it firmly with a hammer to knock out the plastic knockout plug. Reach inside the disposal grinding chamber and retrieve the dislodged plastic disc so it does not jam the impellers. Remove the electrical cover on the new unit and wire black-to-black, white-to-white, and green-to-ground screw with wire nuts.
- • Plastic knockout disc is removed from inside the chamber and electrical cover is screwed tight.
- • Forgetting to knock out the dishwasher drain plug, causing the dishwasher to fail to drain and overflow.
Mount the New Disposal Unit
Lift the new disposal up and align the three mounting tabs on the unit with the slide-on tracks of the existing sink mounting ring. Support the unit from below while rotating the mounting ring clockwise by hand until it engages the ramped ridges. Insert a screwdriver into the mounting lug and leverage it clockwise until the ring snaps firmly into the locked notch.
- • Mounting ring is rotated completely into the locked position and the unit hangs securely without support.
- • Stopping before the locking ring snaps past the detent ridge, which can cause the disposal to vibrate loose over time.
Reconnect Lines and Test for Leaks
Reattach the discharge elbow pipe to the side disposal port using the rubber gasket and flange screw, then tighten the dishwasher hose clamp onto the upper nipple. Turn the breaker back on or plug the disposal in. Run cold water at high volume for 60 seconds while inspecting all joints under the sink, then flip the disposal switch to ensure smooth operation without leaks.
- • No water droplets appear on joints during a 60-second continuous water test with the disposal running.
- • Overtightening the plastic slip-joint nuts on the discharge pipe, which cracks the plastic washers.
Don’t have everything?
- No Center punch (for knockout plug)? Sturdy flathead screwdriver or large steel bolt tapped with a hammer
- No Garbage disposal jam wrench? Standard 1/4-inch hex / Allen key inserted into bottom center socket
- No Channel lock pliers? Adjustable wrench or pipe wrench
Frequently asked questions
Do I need an electrician to replace a disposal?
If the wiring is damaged, unfamiliar or you are not confident working with electrical connections, hire a licensed electrician.
Can I reuse the old mounting ring?
It depends on the disposal model and condition. Many replacement kits include new mounting hardware and gaskets; follow the manufacturer instructions.
How do I avoid leaks after installation?
Use new gaskets where required, support the unit while tightening, run water through it, and inspect every drain and plumbing joint.
What if the new disposal hums but does not spin?
Turn off power immediately. Check the manufacturer reset and jam instructions, and call a professional if the unit still does not operate correctly.